Tag Archives: Presentation

Haiku Deck

D


“The Wanderer’s Eye Photography”

whatisit.png

Haiku Deck is a presentation tool that simplifies the task of preparing a slideshow. It comes in two flavors: mobile app and web version, both of which create slideshows that can be viewed instantly on screen, or shared with a link. Like most presentation creators out there, it allows the user to add text, images, graphs, and public or private annotations. Here’s a comparison of the free and paid versions

[column size=3]

Free version:

  • Limited to 3 decks
  • Decks must be public
  • Themes
  • Uploading own images

[/column][column size=3]

Paid version:

  • Unlimited decks
  • Downloadable decks
  • Video
  • Private Decks

[/column]


Why-is-it-relevant-360x82.png

The great thing about Haiku Deck is its simplicity and how intuitive it is. Users can just click on anything to figure out what to add to the slideshow. Furthermore, with its embedded image search capability (Haiku Deck even suggests a few keywords pulled from your text to use!), users can easily add Creative Commons licensed images into the presentation, without having to worry about copyright issues. The attribution is added to the presentation automatically. Graphs can also be created in-app with all the necessary labels and values. In summary, it allows the presenter to focus on creating the content, rather than spending valuable time with preparing visuals.


how-to-get-started-360x80.png

Check out this example made with the web version, then watch the video below for a walk through:

Haiku deck – Created with Haiku Deck, presentation software that inspires


videopng-360x61.png

Leave a Comment

Filed under Not Subject Specific, Resources

VideoScribe

children-593313_1920

whatisit.png

VideoScribe is proprietary software (*FREE for UBC students and staff via Canvas) available for OSX, Windows, and IOs users for quickly producing high quality engaging videos, no experience or skill required. It comes with a large library of images, and adding and customizing your own content is easy and intuitive. Drop in audio, images, and video and customize their look and feel in addition to their display and animation time with the simple and powerful editor. What’s more, the app will automatically animate images and text you add to your project. When a project is complete it can be published to YouTube or Facebook, exported to PowerPoint, or saved locally.

Features

  • Royalty-free images
  • Automatic image and text animation
  • Download to multiple computers with a single license
  • Works offline
  • Save your Scribes in MOV, WMV, or AVI format
  • *At time of writing (Summer 2017), UBC licensing allows for a one year download that can be renewed by current staff, faculty and students. Update & Download instructions TBA (Sept 2022)

Why-is-it-relevant-360x82.png

Creating engaging content is an important part of presentation. As a digital technology for multimedia creation VideoScribe cuts down on production time and has the potential to significantly increase video quality, requiring little expertise on the part of its users.

This resource is great to use in a second language classroom such as French Immersion, Core French, etc.  It allows for students to creatively engage in language learning.

A students’ perspective including some tips and an example video are available on this blog post on the LT Hub. (Note: download instructions are dated and no longer apply)


how-to-get-started-360x80.png

VideoScribe is proprietary software. You will first need to download a free trial OR if you are a UBC student, staff or faculty member, you can download it via Canvas (or via the Teacher & Learning tab on the LT Hub)

    1. Log in to Canvas
    2. Navigate to the “Help” tab in the left hand navigation menu (question mark icon)
    3. Select “Software Distribution”
    4. Select “VideoScribe”
    5. Select “Contact the LT Hub” – at this point, UBC Learning Technologies Hub will verify your eligibility and provide support for you to access and download a license.


videopng-360x61.png

Check out this video tutorial that will guide you through creating with VideoScribe:

An example of a what you can do with VideoScribe:

A short animation created in about 10 minutes

Leave a Comment

Filed under Not Subject Specific, Resources

Creative Commons Search: Find media you can use, share and remix!

CC Search is an engine where you to find Creative Commons content that you can share, use and remix for educational and other purposes. Using CC Search, you can search for a variety of media types. Remember, though, you still need to attribute/cite sources with most CC content. Some public domain sources do not require attribution (though link backs and credit are always appreciated!)

All resources have individual licensing within the creative commons. As you develop your own resources, you can even apply your own CC license to your content online. For more about how to determine the licensing you want, visit: https://creativecommons.org/choose/

Knowing how you plan to use the media can help in your search. In the CC search, you can select or deselect “resources you can modify or adapt” and “use for commercial purposes” depending upon your intent and context.

Below are some direct links to sources of Creative Commons Images:


As a teacher, you will want to find multimedia resources to use in your slides, presentations, handouts, on your professional blog or class website. You will also want to share with your students how and where they can find copyright appropriate images and media for their own multimedia projects. It is a common misunderstanding that « educational fair use » allows teachers and students to use works/images for their own work published online. Our Ed library has a comprehensive resource detailing image use.
Taking and editing your own photographs or videos has great value but may not always be possible. CC search helps you gather resources that you can feel free to use, as long as you are aware of licensing requirements and generally attribute the work to the author. ALWAYS read and learn before you use!
Often I will create a set of resources or slides for use in my own classroom and then wish to share these with students, colleagues or parents online. Beginning with creative commons media as a starting point ensures my work can be freely shared! This can also open the door to more widely sharing with the educational community through open education repositories such as Teach BC or even the Scarfe Sandbox ;D

  1. Go to https://search.creativecommons.org/
  2. Select “Use for Commercial Purposes” if you are going to sell or share ‘for profit’, and check the box for “modify, adapt or build on” if you plan to remix or change the media in some way. You can leave both boxes unchecked if you’re looking for educational media to us ‘as is’. This will garner more images.
  3. Scroll through the media presented, Select one you like.
    1. You will see the attribution and license link below the image. Copy this so that you can cite the image in your presentation.
    2. To Save/Download the image: Right click (control click on a mac) to Save the image to your computer or click ‘share’ to share via social media or Pinterest.

For a more targeted search of specific media through several different repositories, CC Search has an alternative and somewhat more complicated interface via their ‘old search’ portal. Here, you select the repository you’d like to search:

For Images:

  • Pixabay – allows immediate sharing to various social network sites including Facebook and Twitter. Some high interest and high quality images. Free with no attribution required. This site also links to high quality stock photos you can pay to use.
  • Open ClipArt
  • Google Image (using CC search, you are automatically doing an advanced image search for copyright appropriate/cc images)
  • Flicker
  • Unsplash ( free photo sharing community)

For Media:  Europeana, Wikimedia Commons, and SpinXpress

For videos and music:  Youtube, ccMixter or Soundcloud

To get started with using the ‘old search’ tool:

  • Go to the old CC Search website.
  • Be sure to unclick the “Use for Commercial Purposes” if you are going to use the content for education, and check/uncheck the box for “modify, adapt or build on” depending on your needs.
  • Choose the source website you are going to search from, input your keywords, and click on the Green Search Button.
  • Finally, choose the appropriate size (smaller for fast loading on web; larger for large display) and download the resource you want to use. Don’t forget to read the author rights and give credit to the author while using his/her work! While some sources do not require attribution, most do.
  • You can also watch this 1-minute video that shows you how to get started.

Leave a Comment

Filed under Not Subject Specific, Open Educational Resources, Resources

Augment: designing and customizing your own augmented reality

whatisit.png

Using Augment in Education – It’s all free!

Augment is a tool to design and integrate Augmented Reality (AR) into your classroom. There are three components included: the Augment app, the Augment Manager and the Augment Desktop. The Augment app allow you to visualize 3D Models via the camera on your mobile devices. The Augment Manager is used to upload and manage various models. Lastly, Augment Desktop makes it simple to design and animate models before publishing them (click here for a tutorial to get started with your design!)


Why-is-it-relevant-360x82.png

Augment is one of the top AR apps on the market and is an effective tool that can be used to enhance your lessons and activities. Its visuals can help present your designs and captivate your students with 3D interactive experiences. In addition, it allows you to update course content without wasting paper.
In fact, Augment can specifically help you:
  • Engage students by drawing their attention with interactive presentations, posters and text book enhancement
  • Clarify complex concepts that would be hard to understand with a 2D handout. For example, educators use Augment to help students see the difference in the movement of gas molecules and liquid molecules in containers through animated 3D models
  • Empower your lessons by updating content and models for classes without printing

how-to-get-started-360x80.png

There are a few steps to get started with using Augment in your classroom:
  1. Create an account on manager.augment.com.
  2. Click on upgrade Now and choose Education Plan.
  3. Download the Augment App free on IOS or Android and log into your account.
  4. Upload 2D images of your model, or you can choose to find 3D models to use from the following sources:

videopng-360x61.png

Want to know what other educators did with Augment? check this video out !

https://youtu.be/89nvotfDCgk

Leave a Comment

Filed under AppliedDesignSkillsTechnologies, AR & VR, Not Subject Specific, Resources

Content creation and curation

create


cc flikr stream: suttonhoo22

whatisit.png

Content creation for educational purposes differs from our usual understanding of content creation for the web. We have to take into consideration that the audience is no longer a faceless public, but rather a classroom of learners and parents. So although we are creating shareable and editable videos, images, text, presentations and so forth, you might not want to use the same software used for a primarily web audience. The resources presented here have been selected for their educational value.


Why-is-it-relevant-360x82.png

There has been an increasing shift over the past decade in the use of digital devices and media towards creation, storage and sharing and away from simple consumption. Given the many user-friendly digital tools now widely available, so-called amateurs are now in a position to unleash their creative genes and produce content like never before.We are “now able to create, capture and store an ever-increasing amount of digital information about or for themselves, including emails, documents, portfolios of work, digital images, and audio and video recordings, and can edit, share, and distribute them easily over the net via blogs, personal webpages, peer to peer networks, or shared services”.

As a result of this phenomenon, there are now a proliferation of on-line spaces where individuals and groups can create, co-create, save, store and share their work; a few of which I will share here today.


how-to-get-started-360x80.png

Of course, here at UBC, students and faculty have free access to UBC Blogs and UBC Wiki for content creation and storage but there are many more spaces ‘out there’. Take a moment to check these and others out out. Find a space that works for you or share your own favourite space by commenting! *while all of the applications listed below have some kind of free access, these are not all ‘open’ resources.

  • Interested in digital storytelling? Find some cool tools and share your stories at 50Ways to tell a story.
  • Self-publish your own digital children’s books for FREE ePubBud
  • Store and share your own teaching resource ‘binders’ (basic membership free) at LiveBinders
    *Visit this pbworks wiki page for an introduction to livebinders.
  • TeachAde is an online community for educators that allows lesson storage, sharing and discussion – a potential commmunity of practice
  • Pinterest is a space where you can store and save images for inspiration or use.
  • Teachertube allows users to upload educational video content – this site tends to be ‘free’ of the type of ads found on other popular ‘tube’ sites (IMHO, a ‘safer’ bet for housing and displaying content for students!)
  • While Edutopia doesn’t afford the ability to archive your own material readily, you can access a variety of resources, blogposts, articles and even join the conversation in their blog space.
  • TeachersNet allows you to share your own ideas, learn from others and participate in dialogue through chatboards.
  • Participate in the co-creation of knowledge on Wikieducator which also allows you to save ‘books’ of content
  • See this list of Top 10 Social Network sites for teachers… more on this later when we explore Personal Learning Networks!
  • iTunes U houses free educational/academic content. You can even create and share your own course! See this tutorial.
  • Feeling really brave? Try creating or co-creating your own course – MOOC – see this guide for a  how to on mobile moocs.

*Please note that most spaces (with the exception of UBC blogs/wikis) are housed on American servers and, in accordance with FIPPA, you may not upload and share student content or images without explicit permissions.

**Always check copyright and attribute where needed before sharing content you didn’t create yourself!


videopng-360x61.png

Leave a Comment

Filed under Not Subject Specific, Open Educational Resources, Resources

VivaVideo: Free Video Editing Software for Mobile

hands-1167614_640

whatisit.png

VivaVideo is a free app available for both Android and iOS that allows even the most inexperienced of users to combine and edit audio and visual content on the go. While its interface is rather simple it boasts a wide range of features, form effects, transitions, and filters to live subtitles and dubbing.

Free version:

  • Powerful video editing
  • Creative camera lenses
  • Photo slideshow maker
  • Viedo collage maker
  • Export and sharing

Pro version:

  • all the above +
  • Watermark-free videos
  • Unlimited video length

Why-is-it-relevant-360x82.png

Video has become a central part of media as we know it today. It is a powerful supplement, and sometimes replacement, for writing as it is often more informative and engaging. As such it is becoming increasingly important that children learn about video production and tools like VivaVideo as part of their academic experience. The value in VivaVideo lies in the fact one can use it to edit media without moving the content to another device, speeding up and simplifying the production process. Students can use this software to create anything from short documentaries to amateur films or video presentations. Not only does this bolster student engagement but it also allows students to express themselves and communicate in a manner rather different to the run-of-the-mill essay, poster, or short-answer quiz. After all, the purpose of education is not only to inform but, perhaps more importantly, to create and inspire.


how-to-get-started-360x80.png

Using the device on which you wish to install VivaVideo go to the app on the Google Play Store or the Apple App Store (depending on your device) and click install. Once you have installed the software check out some of the easy tutorials and start making!


videopng-360x61.png

Leave a Comment

Filed under AppliedDesignSkillsTechnologies, multimedia creation, Not Subject Specific, Resources, Video & Video Tutorials

Green Screen for Storytelling


2016-10-06_10-50-33


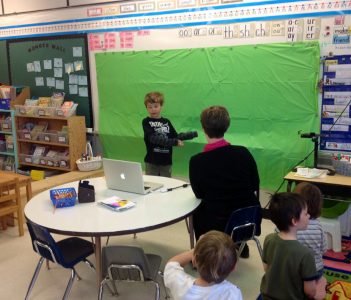
Creative Commons licensed image courtesy of Kathy Cassidy (flickr)

whatisit.png

Create your own narrative using green screen technologies. Using a Green Screen (sheet of fabric or paper or even a chalkboard) and a video editing application, you can filter out the background of any image or video so that you can overlay your central image on any background – real or imagined!

Green Screen by Do Ink is a paid app available for use on iPads and iPhones. It is relatively inexpensive and has a simple and friendly interface that allows one to create green screen videos and photos effortlessly and in a matter of minutes. Features include:

  • Live recording and media upload
  • Combine up to 3 media sources
  • Scrollable timeline
  • Basic video editing
  • Color picker tool
  • Crop and mask tools
  • Saving and exporting

While the Do Ink app makes it fairly straightforward to utilize the green screen effect, there are other ways to achieve it:

  • Camtasia is a more powerful video editing and screen capture software that is available to UBC students, faculty and staff as a free download through UBC IT. One of the many functions of Camtasia is that you can filter out a chroma key color and make a green screen video or image. In effect, erasing the existing background and adding your own.
  • Many other video editing softwares will allow you to filter chroma key colour.
  • There are several free and paid iOS and Android apps on the market but, so far, I haven’t found one I like more than the Do Ink version.

Why-is-it-relevant-360x82.png

Green screen technologies can be incorporated into the classroom in all kinds of ways, the possibilities are endless and include student weather forecasts, time travel and fictional character interviews! Teachers can create media to engage students in a topic, showcase examples and record video lectures or tutorials. An astronomy teacher might be virtually transported into space as they give a ‘tour’ of the stars to their students. Green screen technologies allow you to transport to any place in the world or any time period! Especially now when students and teachers are spending so much time online, green screen technologies offer exciting varieties to one’s video background and are very effective for storytelling. Students can do video blogging, shoot their own movie with special effects or do a video presentation that appears to be taking place in any number of unique settings. For more inspiration on how to use green screen click here.

how-to-get-started-360x80.png

Green Screen Instructions

 1. Download Green Screen by Do Ink from the App Store and open it on your device.
image1
2. Click on “+” sign in the top right corner to create a new project.
image-003
3. Select a source for your project:
      – You could use the camera on your device to capture a picture or video or;
      – Upload existing media
Tip: If the object or person is in front of a plain background, the program can automatically filter it out (green and blue work best).
4. Select the rainbow wheel and turn on “Chroma Enabled”.
5. Select the colour of your background from the wheel and regulate the sensitivity to filter out the background.
Tip: If your background is not all of the same colour, try editing manually for best results:
      – Click on the mask symbol and then the eraser symbol and erase parts that are not automatically filtered.
 image-009
6. When you are done filtering out the background, under the current image or video select a source for the new background.
7. You can then drag and adjust the position and size of your sources by first selecting them from the timeline.
8. When you are ready you can choose if you want your media to display as a video or an image then select save.
image-00f
9. You can choose how you would like to export your media.
image-011
Now start creating and have fun! For more detailed use of the app, check out the Do Ink website.

videopng-360x61.png

Green Screen Videos Bring Content to Life

Green Screen by DoInk App Enables Creation ot Green Screen Effects on iPad & iPhone

Leave a Comment

Filed under AR & VR, multimedia creation, Not Subject Specific, Resources