Tag Archives: app

Inspiration Maps

Inspiration is a concept mapping iPad app that allows users to digitally brainstorm ideas.

Brainstorming helps learners (and teachers!) connect their background knowledge to new learning concepts and content. There are many available free and paid applications (browser based, computer based or mobile) to support concept mapping. Mindmup is a free browser based application that allows map co-creation across devices.

We’re highlighting Kidspiration and Inspiration here due to the robust nature of the software and the fact that many Coast Metro/BC school districts have purchased licensing for either the mobile or desktop app. This paid software (free trial versions allow for the creation of a limited number of maps) allows students to make changes, copy ideas, or collaborate with the ease of moving things around on their maps. Students can add links, images, and other digital resources to their map which is great for organizing inquiry or research projects or storyboarding too! The critical thinking involved in making the connections on a map has tremendous learning value (and supports BC’s Core Competencies).

  1. Download the Inspiration Map App (free version/trial from the app store allows a limited number of maps)
  2. Create a map from a blank canvas OR use their templates
    • The free version allows for 5 free creations
    • You can draw, add shapes, font, insert your own photos, add audio, and more
    • Build diagrams, graphic organizers, or take notes in a visual way (aka Sketchnote!)
    • The paid version lets you import templates from the inspiration website
  3. Choose to save it or share it
    • The free version allows mail, print, and save to photos

Leave a Comment

Filed under Not Subject Specific, Resources

Popplet

whatisit.png

Popplet is a digital tool that can be used to capture ideas and then organize them in a mindmap format. It can be accessed freely on an iPad, smartphone, or computer.

Why-is-it-relevant-360x82.png

Popplet is a collaborative mind mapping software. It allows students to manipulate their thoughts more easily than on paper. They can prepare essays, timelines, and other assignments requiring planning with the added ability to move ‘bubbles’ around that can hold text, drawings, or images.

It’s a great tool to help students scaffold their own learning while documenting it at the same time. How? Students preparing for a presentation (pamphlet, poster, slides) can collaboratively put all their ideas down into the popplet, find evidence to support each topic (photos, websites, video links), and then continue to narrow down their ideas until they a refined draft that’s prepared to move to the next prototype – all in real time from different devices. Of course, teachers might also have students working together on one device to create a popplet (with students taking turns recording).

Popplet is also accessible because instead of typing in each thought bubble, the keyboard allows for voice predictive text to record their thoughts. When working in groups, this means every student’s ideas can be represented.

how-to-get-started-360x80.png

Create

  • Choose your device – iPad Lite or Paid version OR online through a web browser
    • Lite doesn’t allow multiple popplets to be created but if you create an account online, you can create a limited number of free popplets (10 at the time of writing). It’s worth trying it out before purchasing.
    • If using popplet collaboratively, you will need to make your own account and student accounts
  • Make a NEW popplet
    • On the blank canvas, you can either double-tap or click to create a new popple (bubble)
    • Choose to write, draw, add an image, or include a vimeo video to the popple
    • Drag your mouse/finger from one of the grey circles on a popple to create a new link to a related popple
  • Browse other popplets
    • View ones that have been made public for inspiration
    • View templates/examples that popplet has created and modify them

Share

  • Tap on the export or share button
  • Choose to invite a collaborator or share a link
    • Search by email address or by username
    • Students would need individual accounts and ANYONE can add ANYONE – this is a great way to introduce the benefits of using an avatar and privacy considerations are essential – ensure appropriate permissions are in place depending on your context
    • Each popple created would have the creator’s name attached to the popple
  • Make it public
    • to embed the popplet in a class website or student blog
    • to share it via link

Additional Settings

  • Export as an image
  • Present – 2 variations of presenting
  • Change permissions (for sharing)
  • Add Content – Vimeo is offered in the free accounts
  • Duplicate your popplets (great for making multiples when working in groups)

videopng-360x61.png

Bellow, Adam (2011) Popplet


Popplet is generally used in higher grades but it can be used in Kindergarten

Robinson, Staci (2015) Popplet in a Kindergarten Classroom

Leave a Comment

Filed under Not Subject Specific, Resources

BBC micro:bit

micro:bit logo


whatisit.png

A micro:bit is a micro-controller designed by BBC for the use of computer education. It’s basically a mini-computer! The micro:bit can be programmed and makes use of multiple sensors including an accelerometer, a magnetometer, Bluetooth, a 25 LED display and two mechanical push-buttons (the V2 MBit also has a microphone, speaker and touch sensor). The function of the micro:bit is in the open hands of the user’s creativity which can include: games, tools, toys, science experiments, etc.

The micro:bit can be programmed using the ‘official’ code editor which supports block coding (by Microsoft MakeCode), Python and JavaScript. The Micro:bit can also be programmed using a Scratch block coding plugin. 


Why-is-it-relevant-360x82.png

Coding has become a very valuable skill and is recognized as part of the ADST (applied design skills and technologies) curriculum. Outside of teaching your students job-marketable skills, the act of coding helps to teach your students mathematical logic, creative exploration, how to understand systems, and a systemic procedure that exists in common computer programs (automator, video editing, animation, web design.)

By coding a micro:controller, you are also providing students with a more kinesthetic experience. They are coding to ‘make something do something’!

The micro:bit can be used as an entry point for beginners but can also level up to allow more intermediate users (including secondary students and beyond) to code and make.  One of the biggest barriers to teaching coding to a new audience is how complicated and detailed text-based programming languages can seem off first glance. The official micro:bit block code editor attempts to circumvent this barrier by representing functional code bits in terms of visual blocks. This makes coding seem more like joining puzzle pieces together rather than typing out complex functions. To further allow the ‘levelling up’, you can toggle in the make code editor between the visual programming blocks and the javascript editor!


how-to-get-started-360x80.png

  1. Go to microbit.org
  2. Click Let’s Code
  3. Select between the JavaScript Visual Blocks Editor (more guidance, comes with the block editor, tutorials, and projects) or the Python Editor (less guidance) and click Let’s Code under your respective choice. You can also select Micro:bit Classroom to share and manage coding sessions for your classroom.
  4. Start building your code!
  5. Once you are finished building your code, download your code into the form of a .hex file, connect your micro:bit to your computer and upload the .hex file into the micro:bit’s drive
  6. Test it out, revise your code, and have fun!

micro:bit extras
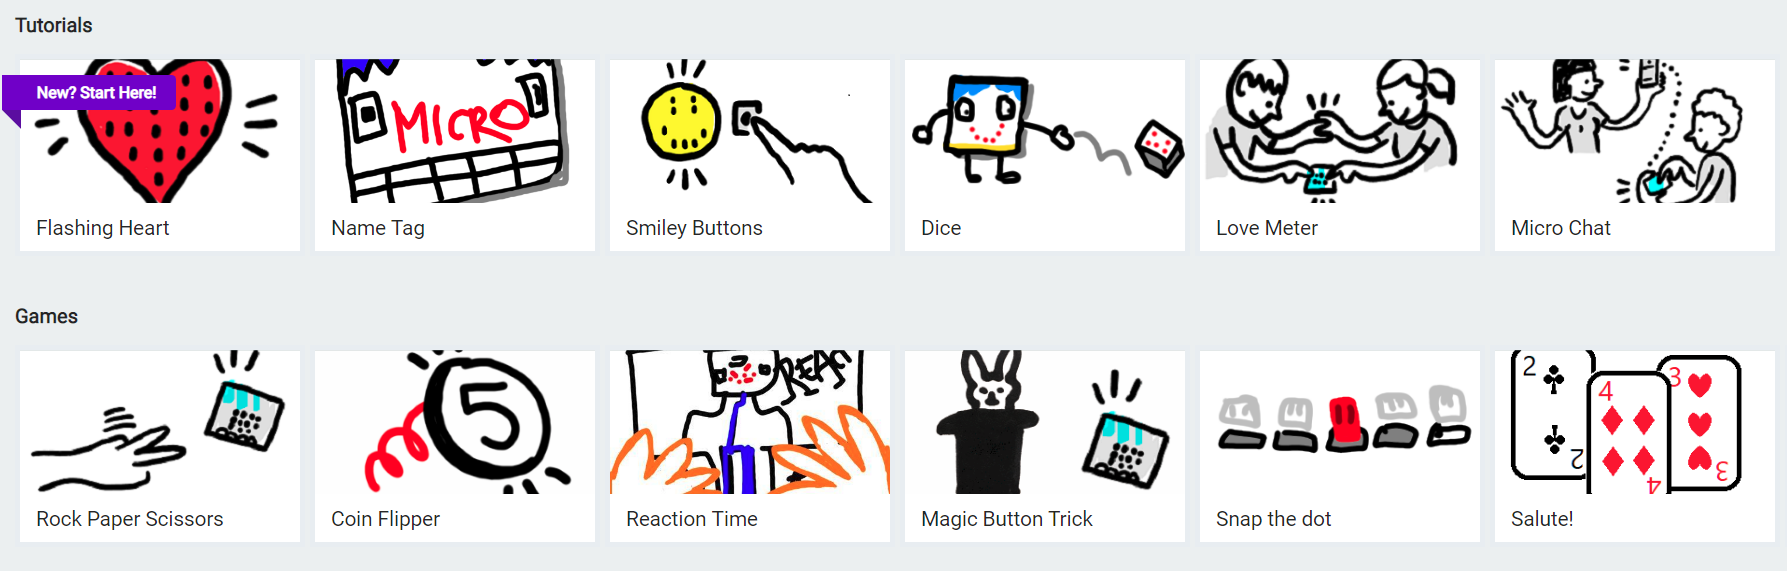
Click above to view a sample of micro:bits’ tutorials and games section.

micro:bit step-by-step tutorials and games

If you are new to coding, and you would like a smooth introduction into how to use your micro:bit, I would suggest starting with micro:bit’s tutorials and sample games. In the official micro:bit MakeCode code editor, you can find micro:bit’s tutorials as well as pre-made sample games in the MakeCode dashboard. The sample games and tutorials will guide you through building a project step-by-step with an explanation of how the code is working.

Block coding to text coding

While block coding is a very effective way to expose students to coding, block coding is not typically used outside of educational contexts. We might see block coding as providing some foundational skills, including computational thinking, as a stepping stone towards learning text coding such as Java, JavaScript, Python etc.

The official micro:bit MakeCode block editor provides a button that allows you to swap between JavaScript and block code. In conjunction with building a program with blocks, a student can flip back and forth between JavaScript and block code to see how the two translate into one another. Furthermore, once a student feels comfortable building with block code, introducing text coding to a student would seem much less daunting. The structural component of block coding remains in text code; the student would only need to learn the syntax of a text coding language to get a fair grasp of the language.

More resources


Check out our blog post about coding in classrooms!
BBC Microbits has a Lesson bank for Micro:bit that is searchable by theme and subject area.

Canada Learning Code MicroBit Challenge connected to UN Global goals.

Pinnguaq is a Canadian NGO working with and within northern, Indigenous and other communities on STEAM, ADST and digital tech competencies and has developed many resources related to MBits and more.

videopng-360x61.png

*post updated July, 2023
Leave a Comment

Filed under AppliedDesignSkillsTechnologies, Resources

AWW App

whatisit.png

AWW stands for A Web Whiteboard, which is exactly what it is. An online digital whiteboard that can be curated by a single or multiple users.

Why-is-it-relevant-360x82.png

This digital whiteboard is device-responsive, web-based, and FREE which means it’s quick to access for multiple users. A teacher can pre-create a board and invite students to brainstorm on it or students can create their own board to be shared. On the digital canvas you can draw, add text, and upload images.

You can also use this app to transform your projector into a “smart board” by using the AWW app on your tablet, connecting it to your projector, and then displaying your interactions.

how-to-get-started-360x80.png

  1. Visit the website awwapp.com and it automatically will present you with a blank board.
  2. Use a blank page or create an account so it can be saved and revisited.
  3. Pre-create a board for students to use OR have students create their own boards.
    1. You can use templates! Find the title of your board, click the black drop-down arrow, click on “Create from Templates”
  4. Save the board & export it to a PDF.
  5. Share the board with others or keep it private.

Some Features (as of October 2018):

  • add text, shapes (circle or rectangle), drawings
  • upload pictures
  • add additional pages
  • share – through email, the automatically generated QR code or URL link, or embed it into a class website
  • choose from pre-created templates
  • FREE CHAT BOX **when logged in with an account**
    • people viewing a whiteboard can leave their questions and comments – great for providing feedback or distance collaboration – which the creator can answer


videopng-360x61.png

Jackson, Holly (2018). Getting Started with “Aww App” Tutorial

Leave a Comment

Filed under Not Subject Specific, Physical and Health Education, Resources

Digital Whiteboards

whatisit.png

Digital whiteboards are also known as Interactive online whiteboards. They are a blank canvas and depending on the application, you can add images, hyperlinks, draw or annotate them, upload videos, and some allow voice recording. Several allow real-time collaborative co-creation while some are more for individual use with sharing options. There are a plethora of options available today with many proprietary, paid options, a few fully free and some with varying levels. I’ve even found two ‘open educational apps’ FIPPA compliant (data housed in Canada) that are worth a try. See the ‘getting started’ section below for a few options.


Why-is-it-relevant-360x82.png

Digital Whiteboards provide a space for students to document their learning, often in multimodal ways. The blank canvas can include drawings, text, images, video, and voice recordings allowing students to create a raw presentation to be reviewed by the teacher or a polished edited version to share with others. Most whiteboard style applications allow for sharing with others and some have ‘collaboration’ options. Digital whiteboards might be incorporated into student assessment (‘showme’ what you know or understand about…), as brainstorming spaces or individual/group project planning or presentation spaces.

These applications can provide students with choice in how they want to display their learning!


how-to-get-started-360x80.png

  1.  Decide on your learning objective and what you want students to achieve. Digital whiteboards can be used to capture various parts of a students learning journey.
  2. Learn what tools are available on your classroom or district devices because some are free while others have a cost.
  3. Download the application or visit the web tool and allow students to play and learn some of the basic functions before assigning structured tasks.

Here are just a few ideas of how a Digital Whiteboard could be used:

  • Explaining: Explain how they’ve come to a conclusion or answer by providing a visual explanation.
  • Presenting: Transform a powerpoint format into a presentation that features their annotations, explanations, and share it as a video that can be refined before being viewed by others.
    • Advantage: Students can hear their voice and re-record their narration until it sounds correct to them.
  • Collaborating: Work with a partner or in a group and record multiple ideas on the one application. This goes beyond a poster because they can add in videos, overlay them with graphs or additional images, and then record different voices to explain their creation.
  • Documenting: Students can create a portfolio that documents different projects or components on each canvas page.

Below are a few examples of interactive whiteboard apps. Click on one to learn more!

    Digital Whiteboards for online Co-creation:

  • AWW app – web-based with free templates
  • Padlet
  • JamBoard
  • WhiteBoard Chat allows for a teacher to launch student boards.
  • Whiteboard.fi is another free whiteboard application I only recently came across. It’s been developed by Kahoot so is worth a look. Teachers can create a ‘classroom’ and provide join links for students.
  • Miro is another whiteboard application with a variety of templates including mind maps and flow charts. Pin notes, type and free draw. Free access includes 3 whiteboards with unlimited team members collaborating. One thing I like about Miro is the ‘infinity board’ aspect… the board can be VERY large and just keep growing with a neat little map feature so you can see the whole board at a glance.
  • Etherdraw and Draw.io are both Open Source/Open Access Apps that are also FIPPA compliant are available thanks to the wonderful community at OpenETC!

Leave a Comment

Filed under Not Subject Specific, Open Educational Resources, Resources

Book Creator (FR)

What is it
Book Creator est une application de publication relativement simple et facile. Le programme est largement utilisé dans de nombreuses écoles du Lower Mainland. Les élèves et les enseignant.e.s peuvent publier un récit en utilisant des éléments multimédias variés, notamment du son, des images, des hyperliens, des dessins et des textes. Il existe même des modèles de bandes dessinées disponibles en version 4.0.

La première fois que le programme est lancé, un bref didacticiel expliquera toutes les bases.

Les caractéristiques de Book Creator :

NB: Certaines fonctionnalités diffèrent d’une plate-forme à l’autre.


Why is it relevant

Les enseignant.e.s cherchent souvent des moyens d’offrir à leurs élèves des expériences d’apprentissage authentiques. En permettant aux élèves de publier leurs livres sur iBooks ou Google Play, où d’autres peuvent les lire, l’écriture devient alors une expérience du monde réel. L’interface relativement facile à utiliser rend cette application accessible, même pour des élèves du primaire. Cette capacité d’exporter des livres de qualité professionnelle vers des cours iTunes U, est une valeur précieuse pour les élèves de tout âge.

Cette ressource est idéale dans une classe de langue seconde telle que l’immersion française, le français de base, etc. Elle permet aux élèves de s’engager de façon créative dans l’apprentissage du langage.

Il y a des opportunités pour les enseignant.e.s et leurs élèves de découvrir et de collaborer sur les pages éducation de Book Creator, ou avec le projet Global iBook, ou même envisager de lancer un nouveau projet de publication collaborative.

Joignez-vous aux discussions sur Twitter pour partager des idées et des conseils avec d’autres éducateurs.rices.

#BookCreator sur Twitter

Suivez @BookCreatorApp

Voilà une critique de Book Creator trouver sur CommonSense Media.


How to get started

On suggère de commencer par l’introduction intégrée de l’application. Un bref tutoriel avec une activité guidée offre aux utilisateur.rice.s la possibilité de visualiser les fonctionnalités et de se lancer rapidement dans le programme.

Book Creator propose aux enseignant.e.s une formation gratuite via des webinaires et un chat Twitter.


Video demonstration

Leave a Comment

Filed under Blog Posts, en francais, Not Subject Specific, Resources, Storytelling

“Explain Everything” : l’application du tableau blanc interactif

What is it

Explain Everything est une application de présentation dans le style du «tableau blanc». C’est également un puissant outil de narration et d’apprentissage qui permet aux élèves de collaborer et de travailler sur le même projet. Explain Everything permet de concevoir et créer des contenus multimédia avec la vidéo, l’audio, des images importées ou dessinées, du texte, etc.

Explain Everything est disponible pour iOS, Chrome OS, Android et Windows.

L’application est payante, mais il y a certaines fonctionnalités d’essai gratuites (ça varie en fonction du la plate-forme et de la licence)

  • iOS, Chromebook, Android et Windows
  • Tableau blanc interactif
  • Collaboration en temps réel
  • Partager directement du “cloud”

Les écoles peuvent obtenir un plan spécial EDU en contactant l’équipe Explain Everything .


Why is it relevant

Il existe de nombreuses applications de type tableau blanc sur le marché, chacune avec ses forces et ses faiblesses. Cette classe d’applications permet aux enseignant.e.s de créer des tutoriels attrayants et de haute qualité, ainsi que de présenter les informations de manière visuelle et attrayante. Les étudiants peuvent également utiliser ces applications pour créer des présentations, des leçons, des tutoriels, etc. VideoScribe est une autre application du même genre. Il s’agit d’un logiciel puissant et exclusif auquel les étudiants, et les professeur.e.s de UBC ont accès via LMS – “learning management system.”

Un excellent objectif pour les applications de tableau blanc sont les évaluations formatives ou sommatives. Plutôt que de se concentrer sur un programme déjà formaté au publication, il faut encourager les élèves / les étudiant.e.s à «tout expliquer» sur un sujet particulier ou à «montrer» ce qu’ils.elles savent (peut-être en utilisant ShowMe une application du genre tableau blanc qui est gratuite).

Cette ressource est idéale dans une classe de langue seconde telle que l’immersion française, le français de base, etc. Elle permet aux élèves de s’engager de façon créative dans l’apprentissage du langage.


How to get started

Il suffit de quelques étapes et un peu de pratique pour commencer à utiliser Explain Everything :

  1. Télécharger l’application Explain Everything depuis l’App Store ( iTunes pour iPad, Google Play pour tablettes Android, etc.).
  2. Avec une adresse e-mail il faut sélectionner / acheter la version le plus convenable.
  3. Ensuite, on clique sur le bouton «+» dans le coin supérieur droit pour créer un nouveau projet. Il existe des modèles pour commencer et modifier par rapport aux besoins. Il y a aussi l’option de commencer à zéro.
  4. Maintenant le temps est venu de dessiner et de travailler sur les animations et les commentaires audios.
  5. Pour plus d’information sur Explain Everything consulter ce document  Explain Everything de Brittney Merryweather.

Video demonstration

Leave a Comment

Filed under Assistive Technology, Blog Posts, en francais, Not Subject Specific, Resources